Rolling Your Own Dithers in Bmp2DHR
Download Bmp2DHR at the following links:
Win32 and latest version complete with source:
http://www.appleoldies.ca/cc65/programs/dhgr/bmp2hr.zip
MS-DOS: http://www.appleoldies.ca/cc65/programs/dhgr/bmp2dhrMSDOS.zip
Other: (Linux, OSX): http://hoop-la.ca/apple2/appleoldies/bmp2dhr/
Bmp2DHR provides 8 “Classic” error-diffusion dithers (command option “D”) and one of my own which I call the “Buckels” dither (of course).
Additionally, for those adventurous souls who wish to try their hand at “inventing” an error diffusion dither or several, Bmp2DHR now supports dithering with imported user defined custom dithers in text file format.
Usage is: “b2d input.bmp dcustomdither.txt”
Before we dive right-in to doing some custom dithering, we need to understand a little about how dithering works. No worries if some of this is confusing at first; Bmp2DHR comes with a money-back guarantee that it gets easier with practice.
This Ain’t Rocket Science
You can safely skip the following reading assignments if you are “up to speed” on dithering and you just want to “kick the tires on this puppy”.
Dithering is old technology. Even error diffusion dithering of computer graphics has been around longer than the Apple II:
http://en.wikipedia.org/wiki/Floyd%E2%80%93Steinberg_dithering
When the world was analog and loosely-wired, and print media ruled, if it was talked about at all, dithering was called “digital half-toning”:
http://www.efg2.com/Lab/Library/ImageProcessing/DHALF.TXT
Dithering is about “noise” :
http://en.wikipedia.org/wiki/Dither
Many explanations about dithering are just “noise” to most ears too. Academic or detailed discussions about dithering can be pretty hard for the average user or programmer to decipher, especially in recent years as dithering and computer graphics continue to advance. Most people consequently end-up with an incomplete picture of dithering and other people’s dithering babble; some good, some bad, and some ugly.
|
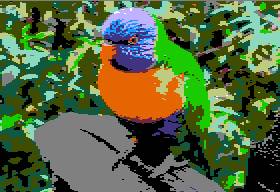
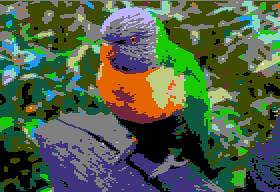
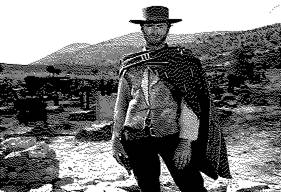
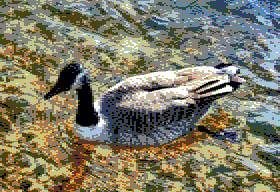
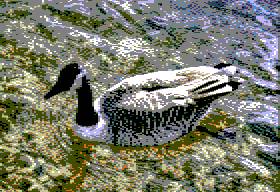
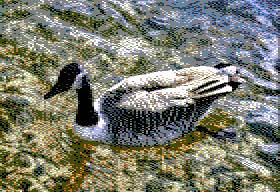
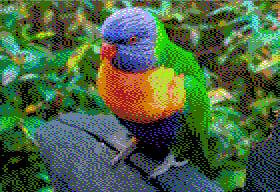
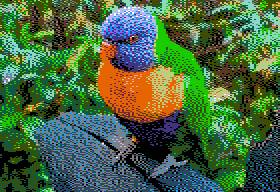
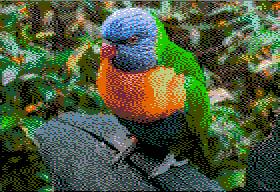
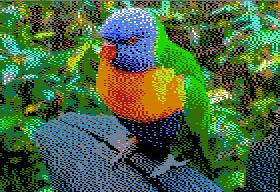
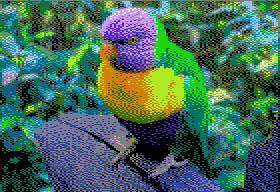
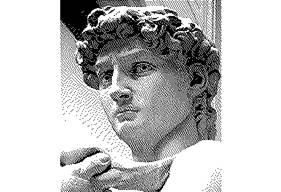
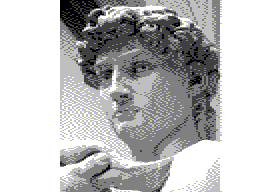
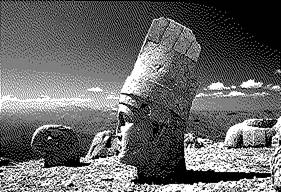
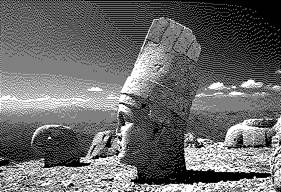
DHGR Monochrome 560 x 192
|
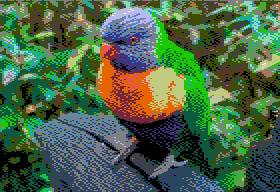
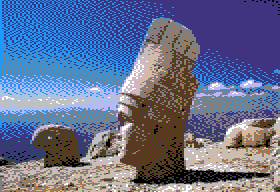
DHGR Color 140 x 192
|
There are different venues for dithering of graphics as well:
- Print Media and Publishing
- Game Development
- Displaying “high end” graphics on “low end” displays like the Apple II.
Bmp2DHR is only concerned with displaying high-end graphics on the low-end Apple II DHGR display, but borrows heavily from the days of “Classic” dithering when the first Macintosh revolutionized the Print Media industry with the birth of desktop publishing and more ambitious goals than simply displaying graphics on a screen.
Bmp2DHR also incorporates “psycho visual” color matching routines from more recent work in game development:
http://bisqwit.iki.fi/story/howto/dither/jy/
However, game development is more concerned with real time rendering and ordered dithering primarily for smooth animation effects etc. Bmp2DHR is really only concerned with rendering colors in DHGR’s limited fixed palette so they are balanced as closely as possible to the human eye; a much more modest goal.
The colors on the Apple II display are not consistent between the earlier Apple II’s that support DHGR like the Apple IIe, and the last Apple II, the Apple IIgs. Nor are colors consistent on composite and RGB displays or even displays of the same type. Since you want to share DHGR renderings like dithered images between other Apple II users, color balance in Apple II output is more important than ever when converting from high end graphics. It is all you can control. You can’t control the colors your hardware provides unless you have an uncommonly fancy display of some sort.
Bmp2DHR uses the Wikipedia palette as its conversion palette by default:
http://en.wikipedia.org/wiki/List_of_8-bit_computer_hardware_palettes
But Bmp2DHR supports several other built-in conversion palettes and eternal palettes in several formats including the GIMP’s gpl format. While Bmp2DHR is convinced that the Wikipedia palette provides the best and most correct compromise for DHGR dithering and all the rest of it, in the spirit of Apple Computer’s own “flexible” policy, Bmp2DHR does not limit the user or its own capabilities, so allows for other opinions by providing palette options and other options that are compatible with, equal to, or better than sophisticated graphics editors like the GIMP, and compatible with hardware that does not agree with Bmp2DHR’s defaults (and its authors opinions).
Custom Dither Text File Format
Bmp2DHR’s custom dither file format is a 4 line text file. The first line is the divisor value for the custom dither matrix. The next 3 lines are each 11 fields of comma separated values that provide the error distribution ratios.
For example, a Floyd-Steinberg dither would be encoded (exactly) as follows:
16
0,0,0,0,0,*,7,0,0,0,0
0,0,0,0,3,5,1,0,0,0,0
0,0,0,0,0,0,0,0,0,0,0
Each of the 3 lines represents the ratios of pixels on a pixel-centric chunk of a center justified scan-line. Line 1 is the current scan-line, line 2 is the next scan-line forward, and line 3 is the scan-line that follows the next scan-line.
Note that the first 5 fields always precede the horizontal position of the current pixel (asterisk), and the last 5 fields always follow the position of the current pixel. Unused fields must be set to 0 values.
Bmp2DHR makes no attempt whatsoever to sum the matrix values to see if they match the divisor. This is left as an exercise for the user. This also allows you to define a reduced color bleed.
For example consider the encoding for Atkinson dithering:
8
0,0,0,0,0,*,1,1,0,0,0
0,0,0,0,1,1,1,0,0,0,0
0,0,0,0,0,1,0,0,0,0,0
You can see that the sum of the ratio values only total 6 but the divisor says 8. Atkinson has a ratio of 6/8 which is a reduced color bleed of 25%. According to history, Atkinson is said to be like Floyd-Steinberg, but if you examine Floyd-Steinberg’s encoding you’ll note that only 2 of the 3 lines have ratio values; line 3 is unused. While it is true that the positions of the first two lines of both dithers have values in the same position relative to the current pixel, line 3 of Atkinson also has a ratio value in the center.
Using a custom dither we could encode a custom variation in the Atkinson pattern with a “normal” full color-bleed more like Floyd-Steinberg. That is exactly what the Buckels dither is:
8
0,0,0,0,0,*,2,1,0,0,0
0,0,0,0,1,2,1,0,0,0,0
0,0,0,0,0,1,0,0,0,0,0
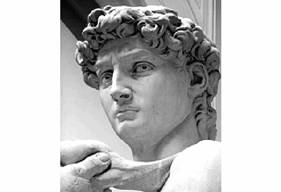
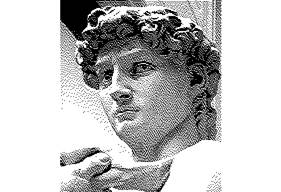
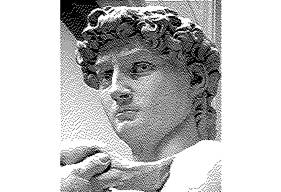
Let’s compare the 3 dithers in our examples now:
|
Original
|
Floyd-Steinberg
|
|
Atkinson
|
Buckels
|

When Bill Atkinson and Andy Hertzfeld collaborated on the development of Atkinson dithering for the Thunderscan on the first Macintosh computer, they saved some ink (the Mac was a Desktop Publishing (DTP) platform with square pixels running a GUI with a white screen).
Since DHGR isn’t targeted at Desktop Publishing, has rectangular pixels, and generally a black screen viewed in the dark it is a little more like a PC than a Mac so your purposes may be better served by a Floyd-like dither.
That’s the idea here; building dithers that may better suit DHGR. Let’s have a look at those 3 example dithers again in DHGR color this time:
|
Original
|
Floyd-Steinberg
|
|
Atkinson
|
Buckels
|
|
The GIMP – Floyd-Steinberg Reduced
|
The GIMP – Floyd-Steinberg
|
|
Tohgr (Sheldon Simms) – Atkinson
|
Tohgr – Floyd-Steinberg
|


I also included the equivalent dithered DHGR images from the GIMP and from Sheldon Simms tohgr in the above examples. Cybernesto’s VBMP uses the GIMP, so this is what you would get from VBMP if you dithered in the GIMP using the Wikipedia Palette (Bmp2DHR’s default palette).
Neither of these other two programs have user definable custom dithers so these examples are just for reference. In fact, the dithers shown are the only error-diffusion dithers available in these other two programs. Bmp2DHR is not limited to its 9 built-in dithers, and unlike tohgr is not limited to only one conversion palette; it even supports user conversion palettes in several formats including the GIMP and JASC formats.
Conversion Palettes and Dithering
|
Original Image
|
Conversion palettes change color mapping and dithering. If the distance between the RGB values in the palette colors is different, the error to be diffused is different, so dithering is different between palettes. The images below are both converted and displayed using two different palettes. |
|
Wikipedia Palette Bmp2DHR – Floyd-Steinberg
|
Sheldon Simms Palette (tohgr)
|

Displays are not consistent between Apple II computers; RGB displays are different from composite displays, etc. These differences have led to many different palettes being used to display “the real Apple II colors” on today’s computers.
The really nasty thing about all this, especially considering
the wildly different color hues between the RGB and composite displays, is that
an image colored for one may not be color balanced for the other. So the user
has the ability to use a different palette.
|
Wikipedia Palette Bmp2DHR – Floyd-Steinberg
The GIMP – Floyd-Steinberg
Tohgr – Floyd-Steinberg
|
Sheldon Simms Palette (tohgr)
|
Building a Custom Dither
Hopefully you have noticed by now that Bmp2DHR does a comparatively decent and artifact free job of converting modern graphics to standard Apple II DHGR files that are easy to display. So now that you have some idea what is going-on with error diffusion dithering for Apple II DHGR, let’s set-out to build a custom error diffusion dither filter.
We’ll begin by defining a pattern. The number series 3,6,9 is an easy sequence to understand so let’s use that and call our “new” dither “Dither 33”:
33
0,0,0,0,0,*,9,6,3,0,0
0,0,0,0,3,6,3,0,0,0,0
0,0,0,0,0,3,0,0,0,0,0
|
Monochrome DHGR 560 x 192
|
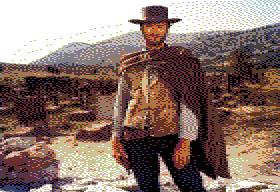
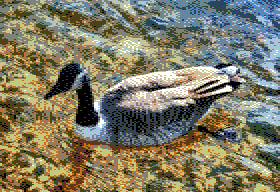
Color DHGR 140 x 192
|
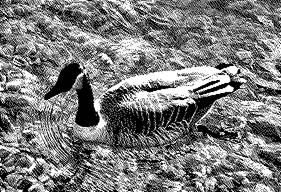
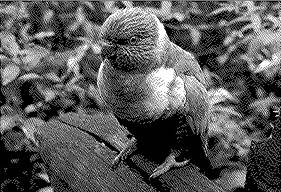

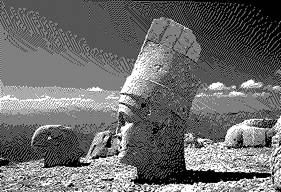
The Monochrome images above were converted using option r25 (reduce color bleed 25%). This is generally a best practice for monochrome. The palette used in the color conversions is a modified Wikipedia palette with an additional lighter grey level (option vrgb) which displays better on an RGB monitor. The images below use the same settings.
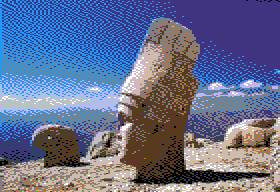
|
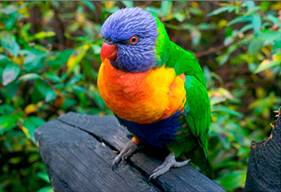
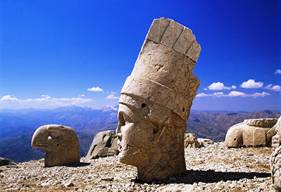
Original Image – 24 bit BMP scaled to 560 x 384
|
|
|
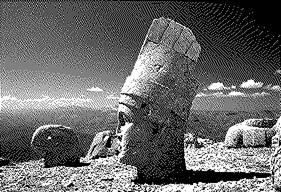
Monochrome DHGR 560 x 192
|
Color DHGR 140 x 192
|
|
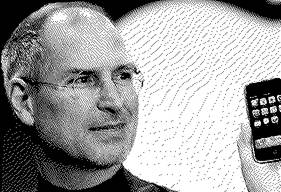
Original Image – 24 bit BMP scaled to 560 x 384
|
|
|
Monochrome DHGR 560 x 192
|
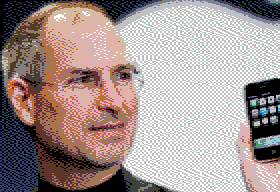
Color DHGR 140 x 192
|

So that was pretty easy. Why don’t we do a couple more custom error diffusion filters so you can get the hang of this, then you can get creative on your own. I doubt if you’ll be ending-up in an Apple II history book like Bill Atkinson. Remember that these days dithering has advanced far beyond what I am showing you here. Also remember back then that standard parts weren’t available to these guys and the world wasn’t filled with color flatbed scanners and camera phones; why FaceBook didn’t even exist back then, if you can imagine that!
So “Dither 33” spread a pretty wide pattern. Let’s hack Floyd-Steinberg now, and create a dither called “Dither 12” that only diffuses to 2 nearest neighbors, the next pixel and the pixel below:
12
0,0,0,0,0,*,7,0,0,0,0
0,0,0,0,0,5,0,0,0,0,0
0,0,0,0,0,0,0,0,0,0,0
|
|
|
|
|
|


Basically this “Dither 12” is a really “crappy” dither. It’s too coarse for one thing so it doesn’t smooth-out the “blotchy” posterized areas of the images very well and creates an exaggerated directional emphasis. Bmp2DHR does not support “Serpentine Effect” for custom dithers and serpentine is over-rated anyway. No amount of fix-up is ever going to fix a terse dither pattern or an imbalanced one for that matter.
So now let’s make a dither that goes really wide and see how that goes.
We’ll hack Floyd-Steinberg again, and spread it further, and call this dither “Pink Floyd”:
# Pink Floyd
# A wide filter sort of based on
Floyd-Steinberg
64 # total of summed parts - full bleed
0,0,0,0,0,*,14,7,5,1,0 # sum = 27
0,0,0,3,5,7,5,3,1,0,0 # sum = 24
0,0,0,1,3,5,3,1,0,0,0 # sum = 13
Note that up to now patterns have been presented without comments. The import dither file can contain comments and blank lines. Anyway, to continue our quest for dithers without borders, let’s have a look at the results from Pink Floyd to see if we’ve hit some kind of wall going the other way with all of this:
|
Pink Floyd
|
Floyd-Steinberg
|

That’s probably enough already. There is only so much error to pass around. With too many pixels in a pattern the error from some values disappears due to rounding. So we can end-up with colors that change and other aberrant behaviour. But if the dithering pattern is properly balanced (not too big and not too small) we may also end-up with a smoother and nicer rendering.
It is left as an exercise for the reader to figure the rest of this out.
Footnote on Color Mapping
A dither is only as good as its color mapping routines. Better psycho visual color mapping results in better dithering:
|
The GIMP –Wikipedia Palette Undithered
Floyd-Steinberg
|
Bmp2DHR – Wikipedia Palette
|