Creating Double Hi-Res Graphics (DHGR) Image Fragments (“Sprites”) in Bmp2DHR – For the Apple II C Programmer
|
Dhishow – DHGR Slideshow Program in cc65 displaying
an Image Fragment
|
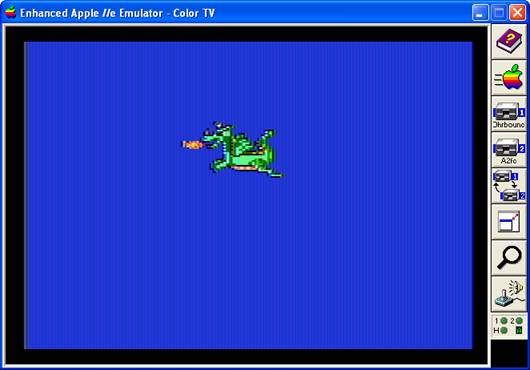
Dhrbounce – DHGR Animated Embedded Image Fragment
Demo in cc65
|
DHGR image fragments can be created using Bmp2DHR simply by saving a color BMP file of any width and height in the range of 280 x 192 or smaller and then using option “F” to convert to Apple II compatible output. The output format is “raw” but scan-line oriented and easy and reasonably quick to load in a C program. Additional embedded output is also available in C Language text format by adding command option “Q”. A black and white background “mask” of the fragment can also be created by using option “FM”.
You don’t need to be a C programmer to use Bmp2DHR’s image fragments in an Apple II DHGR program, but it helps. You can write in any language but from my view, C is easiest (see example below). The cc65 cross-compiler for the Apple II writes small quick code, and you can add assembly language directly if needed. I do not provide example code in BASIC or other programming languages for loading DHGR image fragments. That is left as an exercise for the reader.
All of Bmp2DHR’s DHGR rendering options work with image fragments. You must understand how Bmp2DHR works to use these rendering options to your best advantage and you must understand how Bmp2DHR’s internal scaling works to use image fragments to your best advantage. You must also understand how to program on the Apple II to use image fragments at all. You can start by using my cc65 working examples for loading DHGR image fragments from disk and embedding image fragments in a C program. The rest is up to you.
Simple Image Fragment Loader in cc65 from Dhishow
int dfraglode(char *name,int
hclear)
{
FILE *fp;
int
c,y,y1,xoff,status=-1,width,height,packet;
unsigned src0,
src1, dest;
unsigned char *ptr;
fp
= fopen(name,"rb");
if (fp == NULL) return -1;
for (;;) {
/* read 5 byte
header */
c = fread(lodebuf,1,5,fp);
if (c != 5)
break;
if (lodebuf[0] != 'D' || lodebuf[1]
!= 'H' || lodebuf[2] != 'R') break;
width = (int)lodebuf[3];
height = (int)lodebuf[4];
/* must be in a valid range */
if (width <
4 || width > 80) break;
if (height<
1 || height > 192) break;
status = 0;
if (hclear == 1) dhiresclear();
packet = width
/ 2;
src0 = (unsigned)&lodebuf[0];
src1 = src0 + packet - 1;
/* center fragment on screen */
y1 = 96 - (height/2);
xoff
= 20 - (packet / 2);
for (y = 0; y < height;y++,y1++) {
/* read the
keyboard buffer */
/* stop if keypress */
ptr = (unsigned char*)0xC000;
if (ptr[0] > 127) break;
c = fread(lodebuf,1,width,fp);
if (c!=
width) {
status
= -2; break;
}
#if DHGR_SCREEN_ADDRESS ==
0x4000
dest = HB[y1] + 0x2000;
#else
dest = HB[y1];
#endif
dest += xoff;
/* move to auxiliary screen memory */
maintoaux(src0,src1,dest);
/* move to main screen memory */
memcpy((char *)dest,(char *)&lodebuf[packet],packet);
}
break;
}
fclose(fp);
return status;
}
Preparing BMP Input Files to Scale
Bmp2DHR was first developed as a color BMP to color DHGR image fragment converter to provide output to be used in cc65 C programs. The rest came later. Bmp2DHR is a command-line utility, so it is completely portable because no GUI is needed, nor is the complexity of writing a GUI part of Bmp2DHR, so it can be developed and maintained more easily. Bmp2DHR depends on external BMP editors like The GIMP or Windows Paint to prepare BMP input files including scaling and clipping them to size. Effectively your graphics editor or paint program is your GUI. Since Bmp2DHR offers optional preview output in BMP format (command option “V”), you can also view your results in your effective GUI without needing to import your Apple II output to your emulator or to a real Apple II for viewing.
Bmp2DHR’s “idea” of having a “nominal” input size of 280 x 192 (double-wide) or 140 x 192 (verbatim) to produce both full-screen DHGR images and image fragments comes from doing layouts for graphics programs. Programming using image fragments requires some idea of screen-size. Using a nominal resolution of 280 x 192 on a modern square pixel display provides a relative size that is easier to work with visually than DHGR’s “skinny” 140 x 192 screen resolution, with its rectangular “double-wide fat” pixels.
When converting an image with a nominal resolution of 280 x 192, every second pixel is skipped by default. Using pixel-merge option “M” will merge the colors of 2 pixels into 1 pixel. Alternately a nominal resolution of 140 x 192 provides “non-lossy” verbatim direct pixel mapping that preserves image detail despite the fact that it is visually somewhat of a pain to edit on today’s square-pixeled display.
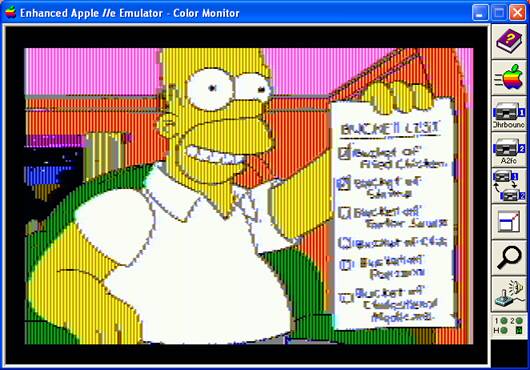
Bmp2DHR’s “Classic” input sizes” (320 x 200, 560 x 384, 640 x 400, and 640 x 480) were added to support additional Full-Screen output from various sources. At “first-blush” these bigger sizes may appear to have nothing to do with image fragments. However the idea of a nominal resolution extends to all the BMP sizes that Bmp2DHR accepts. When I decided to write Bmp2DHR I never entertained the idea of a “free scaled” graphics converter. Graphics editors like The GIMP do a mighty-fine job of scaling and cropping. DHGR converters for modern computers seem to be a little rarer than graphics editors that scale images, and writing yet another “free scaling” editor isn’t on my “bucket-list”.
|
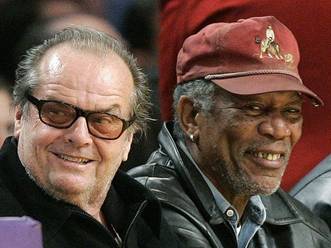
Original 24-bit BMP before Scaling in The GIMP from 500 x 362 to 280 x 185
|
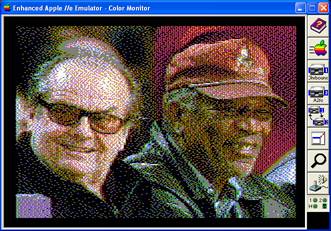
Screen-Width Non-Dithered Merged Pixel DHGR Image Fragment
|

Bmp2DHR is very much a programmer’s tool, and internal scaling by even factors is very much a part of creating output that is predictably scaled for use in graphics programs, whether for background images or image fragments. I wrote Bmp2DHR for myself, with full confidence that, since I am an average programmer and not much of a power-user, the other average programmers and users in the Apple II retro-community shouldn’t have much trouble using the thing. But it does more than prepare content for slide-shows.
The nominal resolution for “double-wide” output from a 320 x 200 BMP input file is 280 x 192. The nominal resolution for output from the larger sizes is 560 x 384; “quadruple-wide” and “double-high”. Command option “J’ (Justified clipping window) will move the nominal resolution “window” around on a 320 x 200, 640 x 400, or 640 x 480 BMP input file. By default, the Justified clipping window is “center-cut” (center justified). Panning options “JL” (left justified - pixels) and “JT” (top justified – scan-lines) followed by numeric arguments are used to offset the Justified clipping window from the top-left corner into the image.
But if command option “J’ is not used for these sizes, color DHGR and HGR output will be proportionally scaled to 140 x 192 before processing full-screen output. However, command option “J” can be invaluable if you wish to port an accurate pixel layout for “Classic” sized background screens from a square-pixel display and you don’t want to change the co-ordinates of an existing layout. You may decide to pan the screen instead. That is up to you of course. Command option “J” also has a tendency to preserve the original rendering better on “Classic” sizes since scaling is by “even factors”. DHGR doesn’t always take kindly to down-sampling “Classic” sizes like 320 x 200 “hand-made” graphics (aka “pixel-art”) by uneven factors no matter how well done.
Full-screen Versus Wide-screen
Graphics for conversion by Bmp2DHR can come from many sources including digital photos, scanned images, the Internet, and legacy sources. After conversion they can be displayed on a variety of Apple II Monitors or other monitors that work with an Apple II including an NTSC television. Bmp2DHR has no way of knowing if the appearance of the converted image will be proportional to the appearance of the “original” image; only you know.
By default Bmp2DHR assumes that a full-screen image must be converted to a full-screen image. Bmp2DHR considers that if you convert a 320 x 200 full-screen BMP input file, you will want a full-screen color DHGR output file and not a “letter-boxed” or a “pillar boxed” screen. And if you prefer, you can letter-box or pillar-box, or even window-box an image fragment in “real time” anyway and save disk space and memory and potentially load-time. Also as a “bonus”, you can avoid the “venetian blind” effect of raw DHGR images without needing to resort to APF format images that don’t belong on the Apple IIe, with their extra complexities like PackBytes run-length encoding and additional programming and an ever-expanding program size ad-nauseum. A lot can be said for making Apple II programs small and simple. There isn’t much memory on the Apple II for one thing, and the processor is also relatively modest, so performance is always a consideration.
|
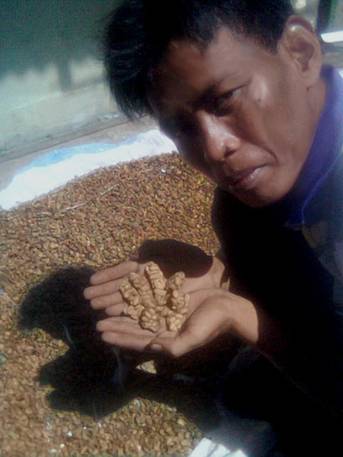
Original 24-bit BMP before Scaling in The GIMP from 952 x 539 to 140 x 144
|
Screen-Width Buckels-Dithered (D9) Verbatim Pixel DHGR Image Fragment
|
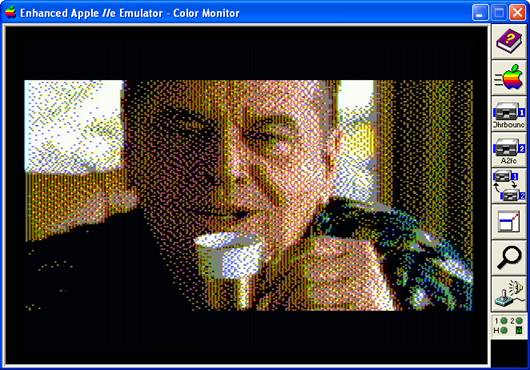
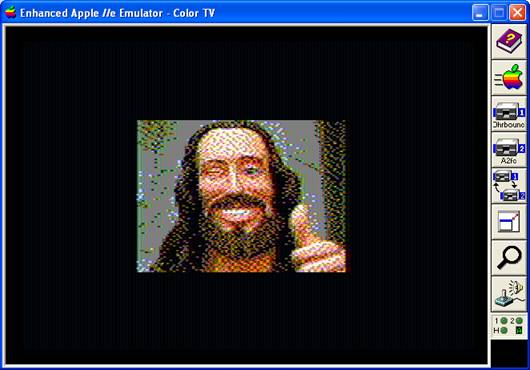
This whole idea of letter-boxing and other even more bizarre scaling techniques like Wide Zoom are from the film industry, and the home video industry, and have no place in Bmp2DHR, so if you are scaling a full-screen Apple II image from a wide-screen source like a full-screen BMP image with a 16:9 aspect ratio, and you want a Wide Screen Version it’s easy enough to scale it with a preserved image aspect ratio to a horizontal width of 280 pixels and convert it to an image fragment, or to do some additional calculations like I have done above and scale to the width of the DHGR screen. A desktop calculator is a marvelous invention if you can’t do the math in your head..
In Bmp2DHR, a converted 320 x 200 screen like a Super Hi-Res (SHR) Screen from the Apple IIgs becomes a 140 x 192 DHGR or HGR screen. According to Apple Computer, the pixels on an “official” Apple IIgs Monochrome, Composite, or RGB Monitor displaying a 320 x 200 Super Hi-Res (SHR) Image are almost square. The pixel aspect ratio is 5:6 (1:1.2). According to Wikipedia, the pixel aspect ratio of a “Classic” IBM-PC Monitor displaying a 320 x 200 Image is also 1:1.2 (5:6). A full-screen DHGR file converted from a 320 x 200 BMP acquired from a “Classic” IBM-PC display is proportional to the full screen of an Apple IIgs Monitor. Since the same “Classic” IBM-PC Monitor may also have displayed VGA images on the same monitor’s physical “real-estate”, it seems only common sense that a full-screen DHGR file converted from a 640 x 480 BMP originally created for a “Classic” IBM-PC display, is also proportional on the full-screen of an Apple IIgs Monitor.
|
Original Image – 500 x 375 – 4:3 Image Aspect
|
Directly Scaled to 560 x 384 before conversion
|
Scaled from 640 x 480 Matrix to 108 x 152
|

640 x 480 is the only square-pixel input size that Bmp2DHR supports. The Image Aspect Ratio for 640 x 480 is 4:3, the same as 800 x 600 images and 1600 x 1200 images (and NTSC television). Larger images with a 4:3 Aspect Ratio generally scale to 4:3 in most editors without a great deal of detail loss. For color full-screens, you may get better results from a 640 x 480 BMP without needing to use additional command line options because Bmp2DHR’s internal scaling is pretty good (have a look at the code).
But you really don’t need to scale a 4:3 square pixel image to a 640 x 480 BMP. When scaling a full-screen BMP of any size at all for 140 x 192 it may be easier for you to scale to a nominal resolution like 560 x 384 or 280 x 192 because your image will still look more or less proportional on a square-pixel display during editing and editing will be more precise. Bmp2DHR’s BMP 280 x 192 color preview output (option “v”) can be edited and “reconverted” since it is in the supported size range for full-screen conversion. As previously noted, when working with a nominal resolution of 280 x 192 every second pixel is skipped. Using pixel-merge option “M” will merge the colors of 2 pixels into 1 pixel.
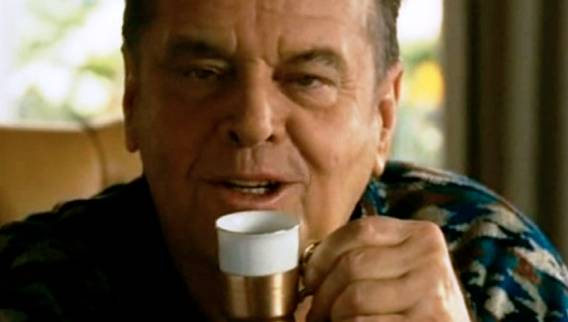
For using Image Fragments together with Full-Screens as backgrounds, and to maintain overall quality, 280 x 192 will also work best as a nominal resolution, unless you want verbatim results in which case you will need to work with “skinny” input files based on a 140 x 192 nominal resolution. To create a 140 x 192 background from a larger image you can use Bmp2DHR’s “debug” output option. Or you can just be “hard-core” like me and “get ‘er done” in a second or two with your desktop calculator and your head. What you decide to use will likely depend on the time of night and how many weeks you’ve been working on your code. A cup of good Arabica Coffee, or Kopi Luwak if you have some available, may also greatly diminish your need for the calculator. Regular meals and exercise may help as well.
|
Original Image – 380 x 507
|
Scaled from 4:3 Matrix to 79 x 192 (140 x 192 nominal) - pillar-boxed programmatically – 9221 bytes
|
These are the types of details that you will need to consider to use image fragments effectively. To understand more you will need to review the Bmp2DHR source code and comments and the other documentation and demo code and work with Bmp2DHR.
Image Fragment ("Sprite") output (option "F")
Sprite format Output is an option. If you “feed” Bmp2DHR a BMP image the same size or smaller than the 280 x 192 screen without using option “F” you will not output a Sprite. You will output a full-screen Apple II A2FC (or AUX, BIN) with your Sprite displayed from the top-left corner against the current background color. This is so you can conveniently look at the sprite on an Apple II display. The latest version of my cc65 dhishow slideshow also loads Sprites so you can use that for the same purpose too. The loader code was shown previously.
If you “feed” Bmp2DHR a BMP the same size or smaller than 140 x 192 without using scaling option “S”, your Sprite will appear twice as wide as it should when it is displayed on the Apple II. Scaling option “S” is automatic when a BMP between 280 x 192 and 140 x 192. But for Sprites smaller than 140 x 192 that are based on a nominal size of 280 x 192 to appear proportional use command option “S” to reduce double-pixels to single-pixels. Use command option “M” to merge double-pixels together. See notes above.
The DHR (Double Hi-Res Raster) Image Format
The Sprites (and optional black and white Sprite Masks) produced by Bmp2DHR are in my XPACK program's DHR format, but XPACK only produces Full Screen DHGR images so this is something new.
The Sprites produced by Bmp2DHR have an extension of DHR. (Sprite masks have an extension of DHM.) Like A2FC and AUX, BIN file pairs, they are stored on an Apple II Disk as ProDOS FileType $06 with an Auxiliary Type of $2000 or $4000 by default. On a DOS 3.3 disk they are stored with header information required by DOS 3.3. Use command option “DOS” if you need these DOS 3.3 headers pre-pended to your DHGR output file(s).
The Header of a DHR (or a DHM) is in two parts;
- 3 bytes of ID data with the letters 'D', 'H', 'R' (or ‘D’,’H’,’M’) in upper-case.
- 1 byte - width in bytes (multiples of 4 bytes - 7 pixels)
- 1 byte - height in rasters
The DHR is a raster
based image with scan-lines of raw DHGR data alternating between auxiliary and main
memory. Therefore a BASIC program cannot load these any easier than in a C
program, since the DHGR screen is interleaved the same way that the HGR screen
is interleaved and not linear, so a considerable amount of supporting code is
required. Bank switching between auxiliary and main memory banks 0 (main board)
and 1 (language card) is also no easier in a BASIC program than in a C program.
For a full-screen DHR, there are 192 pairs of linear rasters, each of 40 bytes of auxiliary memory data followed by 40 bytes of main memory data. Splitting the rasters into pairs keeps bank switching to a minimum while still allowing for linear reading and display from disk or buffer. Because of the way DHGR’s interleaf works, there is no faster way to load a screen fragment.
The full screen DHR loads raster by raster and displays as quickly as a buffered read can display on the Apple II. At 15365 bytes per screen this format provides a modest disk space saving over the 16384 bytes of the A2FC or AUX, BIN equivalent.
As mentioned earlier, a caveat for any file in DHR raster format is the 4 byte / 7 pixel pattern of the DHGR display. The width descriptor in the header is given in byte width rather than pixel width. Image fragments in DHGR must necessarily be aligned on 4 byte boundaries to display properly. Bmp2DHR pads DHR formats as required in an optional background color if desired.
By comparison, HGR image fragments (in my RAG format and not currently produced by Bmp2DHR) are aligned on 2 byte boundaries for proper display but they are still somewhat recognizable if not aligned properly. If DHGR image fragments are not aligned on 4 byte boundaries they are a mess.
Including Load Position in the ProDOS Filing System
If a programmer wanted to load these according to a specific position on the DHGR display, it would be possible to give the starting scan-line and starting byte to the desired position on the screen, and store that as the Auxiliary Type instead of the load Address of 0x2000 or 0x4000 which is meaningless for an image fragment:
- The program would read the header and perform a file integrity check to ensure that the file size was as expected.
- Part of the verification would also be to determine if the Auxiliary Type fell within the DHGR visible screen boundaries and if the file itself would fit.
- Having satisfied this requirement the image fragment could be positioned at that point by the program.
- Doing so would save disk-space and load time when constructing a pre-planned screen in a DHGR program, since full-screens are larger by comparison to creating full-screens from fragments especially if blank screen space is plentiful.
Background Color – Command Option “B”
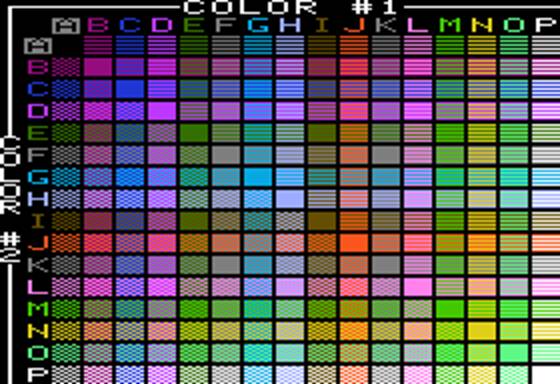
Image Fragments can be used for continuous tone input files like digital photos and complex images, or for “hand-made” pixel art like Sprites for game programming and animation. Of course this is a generalization of sorts. However, if animating a Sprite over some kind of background is “your thing” then you will likely want to provide Bmp2DHR with a background color (a transparent color). The default background color in Bmp2DHR is black. This can be changed to any of the other 14 or 15 DHGR colors using command option “B” followed by a DHGR color name or number.
The color numbers in Bmp2DHR follow the “Lo-Res Color Order”, just like Beagle Graphics used in their DHGR Patterns image, shown displayed below in Sheldon Simms tohgr DHGR NTSC color conversion palette, which is also Bmp2DHR’s default palette (P5). The only output from Bmp2DHR that does not follow the Lo-Res color order is VBMP output. I also follow the Lo-Res color order in my cc65 demo programs, and everything else that I have written for DHGR.
|
|
Background Color
Commands
|
Background Color works reasonably well on its own for foreground display of fragments of non-merged non-dithered non-cross-hatched pixel-art created from an input file with a nominal resolution of 280 x 192. Background color is also used in Sprite Mask file preparation.
Mask files serve the same purpose for dithered and rendered fragments which no longer have “pure” DHGR colors, making background area identification impossible from the fragment alone.
Embedded Output – Command Option “Q”
Bmp2DHR’s command option “Q” (Quiet Mode) serves a couple of useful purposes. One of these is for the Average User who likes to mess with conversion palettes. By using command option “Q” a Pseudo-Palette created by combining conversion palettes can be viewed in stdout (the console window) or redirected to disk as a text file for later use.
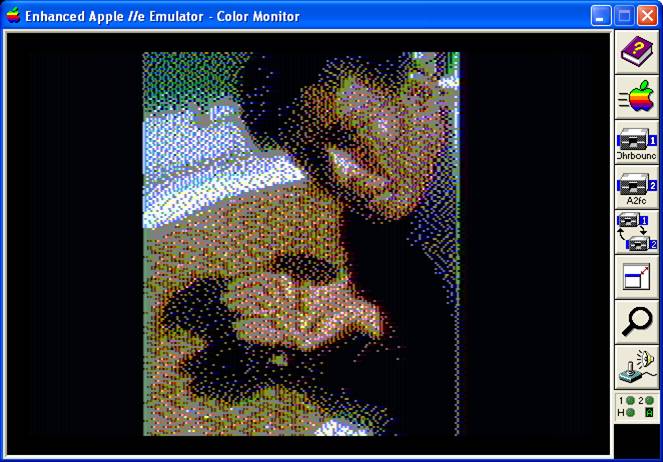
For the C programmer who creates Sprites and wants to embed them in a program, when command option “F” is in effect and command option “Q” is also specified on the Bmp2DHR command line, everything is also quiet except for the text output of the image fragment currently being created, in the format of a C language character array. By redirecting this output to disk as a text-file, the C programmer can paste the embedded fragment array into a C program without much typing. Obviously large fragments should be loaded from disk because memory on the Apple II is not exactly at a premium by today’s standards, but for small fragments this can work pretty well.
|
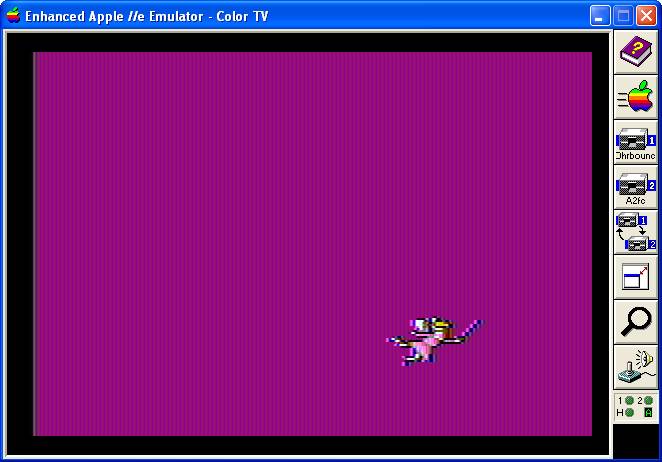
Right Fairy, Left
Fairy – Original Images in BMP format A simple bounce demo probably needs no
explanation but at the risk of putting you to sleep…
However this avoids the main problem of
using DHGR sprites in an animation because to do any meaningful animation
over a complex background a mixing function and additional buffering is required to blend the Sprite into the
background off-screen. It is important to remember that one of
the DHGR colors must be sacrificed for the background using this scheme. If
you are going to dither a Sprite, you probably should create a mask of the
Sprite first using direct pixel mapping to assist in mixing. |
|
Closing Remarks
Well that’s about it.
Bill Buckels
December 13, 2014