Everyone’s Quick Start Guide for Converting Modern Graphics Images to Apple IIgs Super Hi-Res (SHR) Images using the A2FCBmp (A2B) Converter
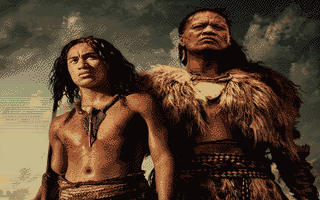
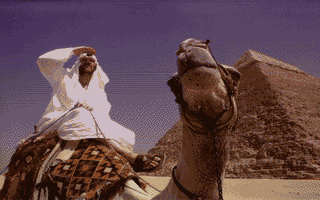
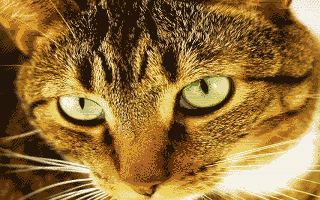
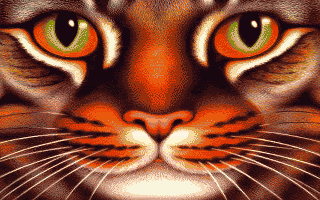
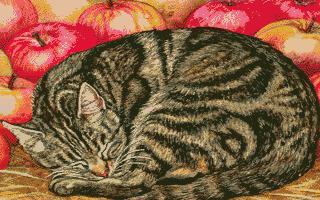
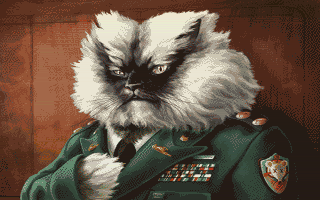
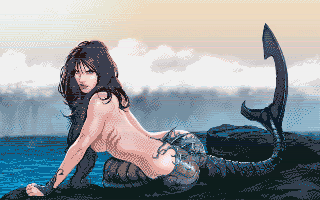
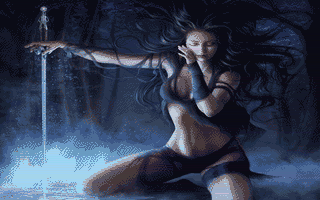
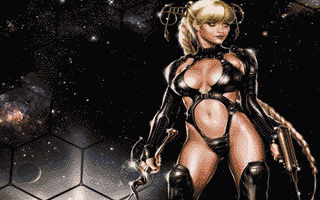
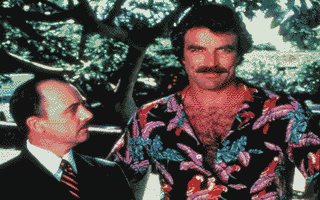
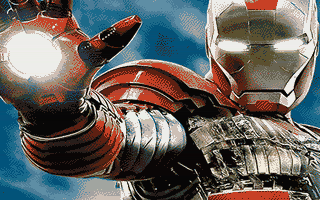
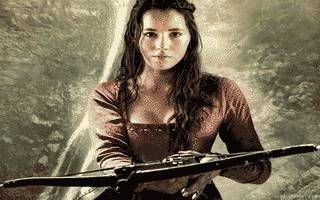
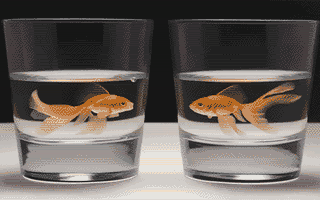
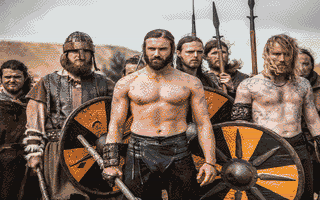
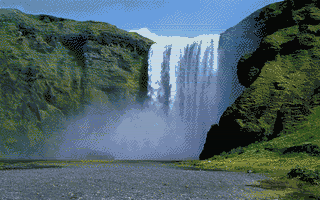
The images below are previews of ordinary 16-palette Apple IIgs SHR screen image files produced by the A2B converter directly from modern 24-bit continuous tone images. These are not simply re-palettized 256 color GIF files and this converter is not merely a “color-counter”; the A2B converter knows how to deal with 16.7 million colors and understands what a “color space” is. The rendering technique used to produce these is called “Image Tone Rendering”. A2B combines an error-diffusion dither called the “Buckels Dither” with modern psycho-visual color matching and other modern techniques to provide high precision gradience equivalent to what we see today on modern displays. These can be used in most Apple IIgs programs that handle SHR images, and easily displayed without “clever programming” in a simple “user written” program, like a program compiled with the modern cc65 C cross-compiler that runs on most modern computers. The A2B converter also runs on most modern computers.
|
|
|
|
|
|
|
|
|
|
|
|
|
|
|
|
|
|
|
|


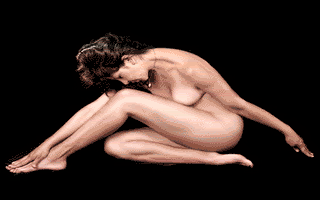

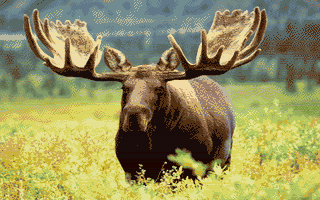


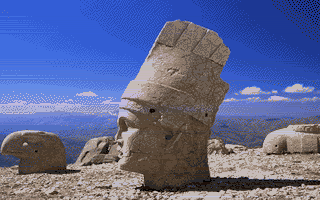
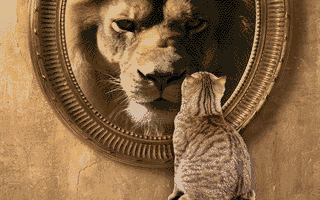
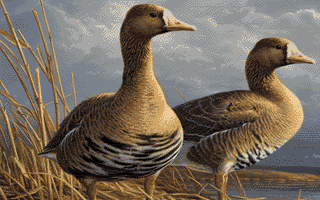

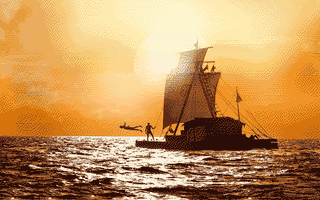
Table of Contents
Download Links and Quickstart
Overview
To Download Example A2B
Output
Apple II Graphics Programming
Projects with Source Code
Perturbation, Tone Mapping an
and Color Space
Viewing and Editing Converted
Output
Explanation of Example Batch
and Equivalent Manual Command Entry
Enter Options in Order,
Filename(s) First
Follow Input (and Output)
File Names with Output Type
Follow Output Type with
Rendering and Other Options
ImageMagick Automatic
Conversion to Useful Formats
Download Links and Quickstart Overview
A2B is distributed with Bmp2DHR in zip file format from the following link:
http://www.appleoldies.ca/cc65/programs/dhgr/bmp2dhr.zip
If this overview does not provide enough information, please read the rest of this article. Some of this article assumes a Windows installation. If you are using Linux or OSX, then you must provide the equivalent configuration and build the binary from the source provided; A2B comes with a Win32 binary only which is always the latest version, and always matches the source because the two come together. If you download some other distro for Linux or OSX you may get an earlier version.
OSX users may wish to check-out the following links:
http://compgroups.net/comp.sys.apple2/announcing-homebrew-tap-for-apple-ii-related/3023433
http://compgroups.net/comp.sys.apple2/update-bmp2dhr-and-a2fcbmp-all-apple-ii-graph/3023374
To Convert Graphics to SHR
To install A2B, download and unzip the Bmp2DHR distro with directories intact. Then create one or several working directories by copying and renaming the template directory included in the distro. Make sure that A2B is on path and you will be “good to go”.
If you wish to use the batch files provided with A2B to do automatic conversions, ImageMagick must also be on path. Automatic conversion of one or many input files in a variety of formats, including jpeg, PNG, and GIF is done by preprocessing using the pre-processing batch file provided with the distro, and discussed later in this article.
A2B accepts 320 x 200 input files in BMP format only (preferably 24-bit depth). It is compatible with BMP files created in Windows Paint (WinXp and Windows 7 versions both), The GIMP, Microsoft Photo Editor, PhotoStyler, ImageMagick, and other BMP file creators like CiderPress and ClipShop. Since varying degrees of compatibility exist, use BMP3 without color map when possible.
For best results:
- Do not rebalance the original file, or adjust it. Doing so is likely to destroy the original tone and cause other damage.
- Crop and pad to a 4:3 Aspect Ratio prior to scaling. Crop or pad with an x-axis multiplier of .75 to obtain the y-axis value. Crop or pad with a y-axis multiplier of 1.333 to obtain the x-axis value.
- After cropping or padding to a 4:3 Aspect Ratio (assuming square-pixel modern input files) scale to 320 x 200 SHR resolution using a good quality interpolation like The GIMP’s Lanczos(3) or ImageMagick’s default For legacy input files of screen images that were not created on a square-pixel display you can probably assume that the display used a 4:3 Aspect (i.e. an NTSC Television or a classic composite monitor, etc.) so you can simply scale these directly to 320 x 200 SHR resolution. Do not cross-scale or up-scale to 4:3 as an intermediate step with legacy images, unless you are experimenting with some re-sampling plan. (Use your calculator, and your mind instead and just do the calculation, it’s only ratio over proportion 7th grade arithmetic.) And don’t assume your editor does a good job of scaling without comparing it to ImageMagick or the GIMP. Not everything that says it is Lanczos works as well as The GIMP’s. Down-scaling results in reorganization and some loss of color information including the original tone of the image. Up-scaling an image may or may not provide decent output. Etc.
- For best results the same toolset should be used where possible to do all your pre-edits including scaling, and external palette generation if used.
- Consider producing separate SHR output using a logical variety of output options and select the best SHR output for your purposes. All images are not created equal so converted output will vary.
- Use preview files to compare output before placing on a IIgs disk.
Some of the above is discussed later in this article.
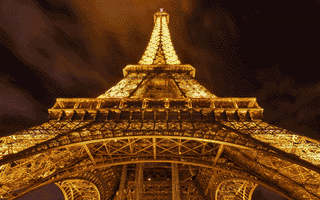
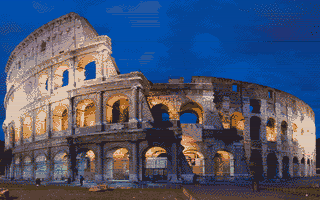
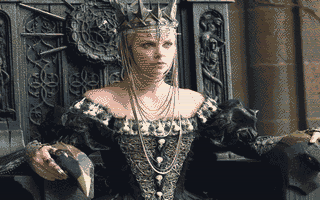
To Download Example A2B Output
More preview output of
16-pallete SHR files produced by A2B from continuous tone images is shown
below. The examples provide hundreds of these in 16-palette, 200-palette and greyscale, etc. for your review to see what this converter
can do. Keep in mind that the pictures shown below will appear differently on
the Apple IIgs display. For one thing, they will not be so squashed, and for
another thing they will likely be somewhat smoother than on the modern display
that you are viewing these on right now. But as unbelievable as it may seem to
some of you, this is for all intents and purposes what SHR can do with
continuous tone images when we convert using a modern converter that uses an
IBM-PC approach rather than using a 256 color GIF file and counting some colors.
More can also be done, but for now I have run-out of time. There is nothing to
prove; basically we did this back then on the IBM-PC; I just never had the
inclination to do it on the Apple II because I was too busy making money doing
MS-DOS programming. I was pretty surprised to find that even SuperConvert on the Apple IIgs didn’t offer error-diffusion
dithering except on monochrome images. The developers on the IIgs certainly
danced to a different drummer than we did. Like I say there is nothing to prove
and there has not been from that time to this. Any questions?
Download the examples, run the programs and read the code (with your MS-DOS
programmer eyes). It’s just old MS-DOS style code like we wrote in the 80’s. I
am just a simple C programmer and my dither is my own, my code compiles and
runs on Windows, OSX and Linux and is just knocked together with standard
parts.
|
|
|
|
|
|
|
|
|
|
|
|
|
|
|
|
|
|
|
|


http://www.appleoldies.ca/a2b/disks/
Download from the link above. A list of files for download with be displayed and you can download one or all of them. A2B has no demos; only slideshows of un-retouched SHR files produced by A2B.
During the development and testing of A2B I produced many SHR files and saved them in an organized manner. My intent is to make most of these available as time permits. I cannot provide the input files. They do not belong to me because they were not significantly transformed from the original work, so to distribute anything but my significantly transformed derivatives would not be fair dealing. Most of the original files can be easily found using google images, because that is where I found most of them.
Some of these SHR files have already been put on disk images in HDV format and stored in same-named ZIP archives, and are on the website, and can be downloaded from the link above The disk images are organized into slide-shows in subdirectories and can be run in an Apple IIgs emulator (like kegs32) or transferred to and run on a real Apple IIgs. Usually each subdirectory will contain a slideshow of SHR images that have been created with the same type of SHR format and rendering. A disk image will usually contain slideshows of the same group of SHR images for several different SHR video modes; 16-palette, 200-palette, 1-palette, and 1-palette GreyScale.
The SHR files themselves are not perfect, and have not been retouched. Had they been retouched they could not be properly used for review, and by retouching these some would become significantly closer to the original work, and that would not be fair. They are intended primarily for review purposes so you can see what this converter can do as part of an automated conversion process, or from the command-line, without special tweaks. In practice, some users may want to edit their own A2B output in some way to remove stray pixels, etc, to create better production images. A2B provides several options for support for reprocessing edited output discussed later in this article.
A2B is under active development and disk image archives of example output will be added, or updated on a best-effort basis. Again, these will not be perfect and are not intended so much to shock and amaze you, but to provide you with real examples of what the A2B converter can do.
Additional Links
The following links will provide you with some additional more recent work that I have done with Apple II graphics including SHR. In particular you will find the cc65 slide-show program that is used on these example disks noted above complete with source code. You can use this as a starting point if you want to build your own programs that use these SHR images. Cc65 will run virtually everywhere that A2B runs. This material is targeted at the average programmer.
For information about
becoming an accomplished Apple IIgs programmer, you will need to talk to an
expert; I am just a simple C programmer sharing a different point of view. If
you want to take things forward sometimes you need to look at things from a
broader perspective. Using the C programming language and brute force combined
with dismissing a restrictive belief system is always a good start. This of
course comes with the hope that anyone who takes this further will always add
to it with their own perspective. It could very well be that a real Apple IIgs expert
will see things that I don’t see, or a real graphics expert
who sees what I have done and how it can be improved may take this further,
although I won’t hold my breath, because it hasn’t happened yet unless I am
missing something.
"A human being
should be able to change a diaper, plan an invasion, butcher a hog, conn a ship, design a building, write a sonnet, balance
accounts, build a wall, set a bone, comfort the dying, take orders, give
orders, cooperate, act alone, solve equations, analyze a new problem, pitch
manure, program a computer, cook a tasty meal, fight efficiently, die
gallantly. Specialization is for insects." - Robert Heinlein
Apple II Graphics Programming Projects with Source Code
|
Index of Recent Work (cc65) http://www.appleoldies.ca/cc65/programs/ Previous Work (Aztec C65) http://www.appleoldies.ca/graphics/ Related Links See Also |
Articles and Technical Rants
Some of the articles are not graphics mode specific. Some of the articles are very much draft quality or want to be revised and added to, and this will be done as always on a best effort basis with my focus being development first. These articles also chronicle my personal journey through Apple II retro-programming so come at it from different levels of understanding, depending on my mood at the time. One thing that holds true is the fact that doing this is fun; it doesn’t pay money and because it doesn’t pay money it’s a hobby. None of this is commercial work or work for hire. Source is provided. As far as I know all the material here is fairly used and most can be used in your own programs.
Speaking of moods,
since I called us all insects a little earlier, I should also point out that
for the first many years that I wrote in C for the Apple II, I resurrected and
used the Aztec C65 MS-DOS cross-compiler to write my Apple II code; I was a
retro-MS-DOS developer in my role as a retro-enthusiast. But Aztec C65 was very
inefficient compared to cc65, and with Windows 7 no longer supporting MS-DOS,
and other issues related to being cross-platform compatible in this brave new
computing world of ours I made the shift away from Aztec C65 and MS-DOS
utilities to cc65 and gcc compatible utilitities; not much of a change really. But far simpler and easier to share code and programs. So
you will see that some of my articles reflect this particular change. Unless
you want to explore old junk like I did to get the hang of the Apple II as it
was then, write in cc65, and simple C like MinGW or gcc, stay away from platform dependent libraries, and work
on your modern computer with modern utilities like this one and work with
modern images in modern editors, and you might actually get something
accomplished.
Forward
This article is about creating SHR files from continuous tone images using a graphics converter that I have written called A2FCBmp; the Windows binary is called “A2B.exe”. My recent development of A2B added the capability to produce Apple II SHR screen image files from 320 x 200 bmp files. My latest changes include output options that aim to provide good quality rendering of continuous tone images for the SHR display using the tones in the image rather than using direct pixel mapping like the other SHR graphics converters that I know about.
Some Rationale
My solution for conversion of Modern Graphics to SHR files using the A2B converter is highly compromised (like any solution for converting complex graphics to SHR format) due to the hardware constraints of the Apple II display. At the same time, today we have very good graphics toolsets (editors, etc) that can produce a very high quality 256 color GIF file that displays quite well on the IIgs after conversion with existing converters like Convert3200 and SuperConvert.
However, I remain convinced that better results can be obtained by combining classic methods with modern methods in a tone-based converter. Although this is my first attempt at such a thing, my converter is built from the ground-up with “standard parts” that are commonly available today, augmented with my knowledge of the mechanics of the Apple IIgs SHR display (which by comparison to some displays I have known is not really very sophisticated), so there was no reason why it wouldn’t work, and it did. But at this stage in its development I have kept it fairly simple. Since many of the principles involved in tonal rendering conflict with the methods used in existing converters I did not add code for “classic” conversion by juggling palettes; I simply skipped that part when I wrote this converter because the other converters already do that.
In the interests of getting this part of my development finished, I have not extended this much and have scoped my development very narrowly. I call this a converter but compared to what most old converters do, this is more a special purpose rendering engine that saves to an SHR native format after transformation. We are surrounded by converters today and the world hardly needs another unless it provides some significant advantage over what’s already there.
Working Environment
The whole idea behind a modern graphics convertor is to lever a modern toolset and to not “reinvent” the wheel.
You will need to do some typing to use the A2B converter because A2B is a command line utility like my other recent converters. From my view, if you are a retro-computing enthusiast working on the Apple II, you should already know how to type, so this should not matter to you. The A2B converter also has a preview mode so you can see the results of your conversions by clicking-on the preview image which means that you can try different conversion options to “fine tune” your conversions before putting them on an Apple II disk. Also you can edit, then reprocess the preview file instead of the input file, in case you want to clean-up a stray pixel or two; to my way of thinking it is very painless to edit a modern graphics file in a modern graphics editor.
Use the Force (Brute Force)
Today modern images like wallpaper and thumbnails can be generated on “the fly”; that’s what we do here too instead of poking around with a mouse (one’s mouse should be left on the table for the most part unless needed to save a move). A2B runs in scripts by its very nature as a command line utility, and comes with working scripts for Windows (discussed later) which can easily be modified for use in Linux or OSX if that’s what you use. Large numbers of conversions can be done non-interactively using various options and reviewed later to pick the best conversions. This is not a new idea however. My graphics converters ran the same way back in the 1980’s when computers were slower. Today we just get more done, more quickly, because we can run at higher speeds and because we can run at higher speeds those of us who write converters can work to a very fine precision and do a better job by combining modern technology with brute force. Comparing a modern command line converter’s performance to a converter that was written when the Apple II was still in wide use is like comparing breaking bricks with one head to using a jackhammer to break bricks; providing of course that the modern converter works in the first place.
Modern Terminology
The terms that I use in this article are not new terms. A lot has happened with computer graphics since the time that the Apple IIgs was in wide use, so the terms that we use these days have become much more complicated even when talking about graphics on an old computer like the IIgs. If you have trouble understanding some of these terms, try following the inline links. If you still have trouble understanding them, just download and run the demos and figure things out from there. If you haven’t stayed current you probably need to upgrade your thinking especially if all you are thinking is that all a graphics converter for the Apple II does is count some colors, but fortunately no hardware upgrades are needed to display the output from this converter on your Apple IIgs SHR display.
Input Image Quality Plan
I have written this next section in plain language as well. If you were expecting a brief technical overview, forget it!
The requirement for a continuous tone image is always the same. The original balance of the tones in the image must accurately created and preserved through other transformations like scaling to 320 x 200 from an input image with a 4:3 aspect ratio outside A2B. This means that good toolsets like ImageMagick (my current favorite) or The GIMP (my current second choice) must be used, and less capable toolsets must not be used. This is really no different than what today’s graphics designers must consider, so consequently the Internet is filled with many exceptionally good images that convert well provided the chain of custody is not broken by a low-quality transformation.
So yes, I am telling graphics designers how to do graphics design, or rather telling them how not to do graphics design. The techniques of using a limited set of palettes that were practiced in the days of the IBM-PC’s MCGA display must be abandoned. Instead use the full capabilities of your editor and work to the highest resolution possible. If you are a photographer, the same principles apply to this converter; properly lighted and contrasted images convert better than photos taken on your father’s first digital camera, or scanned-in on an old scanner from early prints of home photos. My best results during the thousands of images that I tested were not always from professionally produced graphics and photos, but the most consistent results were. Good tone quality cannot be added to an image easily, if at all. My attempts with the tools I used over the two years that I tried to improve bad images during testing all failed; basically all I ever succeeded in doing is trading-in one bad color space for another. Yet I always got good results from Wikipedia’s good quality images, etc.
The A2B converter uses two methods to obtain its tone for rendering which are discussed briefly in the next section. These two methods do not help improve image tone quality after it is lost; nothing does. The best possible scenario if you are converting a low quality image; One is sometimes called “over-sampling” and the other is called “under-sampling”. Even a really good image might need to be oversampled to get the most out of it on the SHR display, despite the nosier conversion. Generally a good input image will convert best using one or the other. A good image will usually convert to a 16-palette normal SHR file. Brooks 200-palette conversions are generally more detailed and may also be too “busy” for your tastes or may add some colors that spoil the effect of the simpler 16-palette conversion.
If you are contemplating using this converter to produce video frames for motion video for your IIgs from the frames in a youtube video or something like that, generally a normal SHR conversion will provide sufficient detail through the video sequence without needing to resort to the complexities of using a Brooks loader, providing the input images from your video clips are evenly toned. Flash Player doesn’t do a great job in providing detail, but the frames are evenly toned. But it would best to get some utility that can just rip a video into jpegs, and to convert these to SHR format using A2B in a script and not to bother with doing manual screen grabs at all.
Perturbation, Tone Mapping an and Color Space
|
|
|
|
|
|
|
|
|
|
|
|
|
|
|
|
|
|
|
|


While the A2B converter deploys a combination of filters to render a graphics image to the Apple IIgs, one common method that is used throughout this converter to map and reduce colors from the original image is called “perturbation”. By definition any continuous tone image of any complexity at all that has a color depth of 24-bits and can contain 16.7 million colors cannot be directly mapped to the SHR display which only sports a color depth of 12-bits and 4096 colors, constrained also by SHR’s limitation of 16 colors per line, and for normal SHR images, further constrained by a maximum of 16 color palettes that must be shared between 200 lines of image data. A2B renders in 24-bits of color depth using double precision floating point and does not reduce the output image to 12-bit color until the SHR image is created in Apple IIgs format.
The A2B converter also deploys “tone mapping” to organize and render an SHR image for the Apple IIgs display. Obviously colors must be lost during such a massive downscaling. One of the effects of color loss is image tone loss. On the SHR display if a converter is not careful and does not consider the overall tone of an image with respect to the colors selected for rendering, banding will occur. Banding will occur anyway even when tone is considered, so A2B provided a framework to use the banding constructively in the rendering of the image. This framework depends on perturbation of the original colors in the image to a fixed map based on a color space that describes a relative distance of the color range that is initially used to group the colors that are available for rendering.
Right at the beginning of the conversion process, you can provide A2B with an initial “color space” of 16 colors to define the (global) image tone, or A2B can make its own internally. By default A2B uses a palette that is based on the mean values of Sheldon Simms NTSC conversion palette for DHGR images and Super Convert’s RGB conversion palette for DHGR images. Using the default palette exaggerates the color space and provides more detail on some continuous tone images. But on others, it is softer and more pleasing to use an external 16-color palette (or a second 16-color image) created from the original image in a good graphics editor like ImageMagick (preferably) or The GIMP to constrain the initial color space to that of the image tone. The outliers will be ignored unlike when the default is used.
A non-technical person
could think of these color spaces like different lens filters on a camera. In
truth that’s really how they work. The example batch file a little further in
this article shows how to convert to SHR using both an internally and
externally defined color space, and the demo disks provide example output for
both from the same input file, so you can just review each on your Apple IIgs
if this is too complicated.
“Classic” Apple IIgs graphics converters typically do not use perturbation, a color space, and image tone. Nor do they work with 24-bits of color depth etc. They depend on the external GIF creator to have done all this in advance, so what a classic converter does is juggle the colors in the GIF around until there is no more room in the SHR palettes. While A2B may seem to be doing the same thing it is not. But to the average person, understanding what the differences between A2B and a GIF palette-juggler is a difficult learning curve. The problem is not even the same. A well written classic converter will work effectively for a GIF file especially for pixel graphics that are to scale. A2B will too on 16 color images that are to scale, but it is there that the comparison between A2B and a classic converter ends.
An additional level of complexity in displaying an SHR image called “color mapping” cannot be always be resolved by any converter. This is where the display monitor is calibrated by the user to look approximately the same as the LCD monitor displaying the original image. The advantage to using tone mapping over translating a GIF of a photo is simply to provide more accurate toning a precisely as possible overall. While classic converters will do pretty well if the GIF itself is pretty evenly toned they lack the precision to preserve a continuous tone.
Both A2B and classic converters are at the mercy of input files. A GIF converter is limited to 256 colors and the precision and the palette that was used to save the GIF. Colors that may look good on the creator’s display may be too “out of wack” to calibrate the tone evenly on the SHR display monitor. A2B starts off with the idea that preserving tone is as important as preserving pixels. A2B is simply not a classic converter, and will use the tone in the image file so a continuous tone image presumably has a better chance looking good on the SHR display if the monitor can possibly be calibrated to be close to an LCD display. That is the theory but the fact will depend on how you see the conversions provided by A2B.
But that’s enough theory for now; we’ll get back to this later, here and in other articles. By now you get the idea that A2B is doing something different than classic SHR graphics converters.
Viewing and Editing Converted Output
Generally a converted continuous tone conversion will have a few stray pixels. A classic converter may or may not. Output from either type of converter can be edited on the Apple IIgs, however that is really not the way to use A2B. A2B comes with an output option to provide a Preview Image. The Preview Image is great for comparing one set of conversions to another when you are trying different options to see which one is better. But when it comes time to edit out stray pixels to make a production image for the SHR display you have some things to consider:
- Use a modern editor. It’s better from a production perspective and you probably have one anyway.
- You must not add colors to the A2B preview output if you are going to edit and reprocess it. You could also edit a copy of the input file (before or after scaling to the 320 x 200 Bmp file that is required by A2B). That’s great for your initial composition but not the best way for cleaning-up stray or unwanted pixels. Instead of the “V” option for a preview, use the “M2S” option for an additional BMP format palette file and save this away. Use one of the other colors on the line to do your editing with (use your color selector to set your draw-color from a color on the line).
- When you are done editing use the M2S utility to create your SHR production image. It will use the palette BMP provided by A2B together with your edited image.
The A2B SHR Rendering Engine
The rendering engine that A2B is comes from the Apple II community and the csa2 usenet news-group. The idea behind segmenting the 16 toned segments into a somewhat geometric description of the 16-palettes image comes from Alex Lee. He defined this requirement early in the latest development. The vision that I share with Alex is that an editor interface will eventually exist that will visually display the image in sections with the corresponding palette, and dynamic editing of the palette, and the sections of the image can be done in tandem. There are many cool things that we can incorporate into such an interface. But in the meantime by editing the preview output as previously described and reprocessing the edited preview using M2S most of this sort of functionality is already there. However, Alex Lee’s suggestion provided me with a clue how to automatically segregate the image into generally equal segments to maintain the tone in groups of underlying super pixels. Due to the IIgs hardware constraints, chose to bind the super pixel code in with the rest of the code implementation but make no mistake; this is not simply “posterization” otherwise the output would look like EGA colors. In my previous converter, Bmp2SHR, I explored the use of posterization along with thresholds and population based quantization and classic color counting. This converter radically departs from those methods. Color counting is never done at the global level either, nor where you expect color counting to be done. It’s complicated and you can read the code to see when a count must be deployed; generally after colors have been assigned their place within the color space through perturbation. Color counting is also not done during final allocation of palettes before SHR output; color distance is used instead.
This brings me to the next contributor to A2B. When Bmp2SHR failed to produce radically better results, and often worse results than a classic SHR converter, I experimented with extending my classic sorting algorithms with “hue” based techniques which work well for gray-scale SHR in A2B (better than “traditional” average of RGB values). Jonas Grönhagen (STYNX) was quite involved with Bmp2SHR at first then went-off and began work with the ImageMagick API. Shortly thereafter, I joined Jonas and provided him with “back-end” routines for what became the “Simplifly II” we-based SHR conversion server. These back-end routines are the M2S utility that comes with A2B discussed earlier. The Simplifly converter use an iterative process and line level comparison rather than palette color count for final palette evaluation and assignment which provided A2B for the general framework for final allocation of palettes.
All three of these converters work. This new one (A2B) is more like what Jonas did with Simplifly, but all three are entirely different in many ways. So by now you get the idea that this is something different than what Jonas and I did, and also different from a classic converter. I knew I needed to revisit SHR with something more modern and I could also see some limitations in using the ImageMagick API when it comes to my usual requirements of avoiding library routines to support portability.
I then went on a tangent for several months trying to modernize my other Apple II graphics routines and converters, including using the cc65 C compiler, and in doing so extended Oliver Schmidt’s previous work with improved versions of my own Aztec C65 graphics routines and eventually added support for all the graphics modes to my cc65 programs, making my routines freely available as I had always done. Now I was ready to tackle SHR and I wrote a single-palette sprite converter for SHR called Bmp2Sprite to test color distance methods using Euclidian distance rather than direct color matching. Following that, I parked SHR and went on a rewrite of my conversion utilities for all the Apple II graphics modes. It was through my work with DHGR NTSC that I became aware of Sheldon Simm’s work with AppleWin NTSC and his tohgr converter. The palette that Sheldon had meticulously fine-tuned for NTSC DHGR eventually formed the basis for my work with Sub-pixel rendering in A2B.
A2B became a second graphics converter to Bmp2DHR and later expanded once again to Lo-Res and Double Lo-Res. During the final changes to A2B before it became an SHR converter as well, I added the routines to produce up to 320 x 200 background screens for Lo-Res and Double Lo-Res, and realized that I had everything in A2B including my own dithering routines to what I had originally set-out to do, and build a modern graphics converter that combined my extensive but somewhat classic knowledge of IBM-PC graphics from the 80’s and 90’s with the knowledge of graphics on the Apple IIgs display.
Eventually if one works at something long enough using standard parts and methods, one will end-up with something that works. At first I was enthralled with my single palette SHR routines simply because they did the same thing my DHGR routines did in SHR’s better resolution. After trying many options I was able to get Image Tone rendering tied-in with all the rest of the ideas that I had at the time. Today my documentation is years behind in some respects, and non-existent in others, so this article and samples of output are both long overdue. And that is the purpose of this quick-start article; to make this usable for everyone, and also to say this can only get better but it works pretty well already.
And by now you have the idea that you will be able to try it yourself and run the demos and produce your own pretty radically different SHR conversions from modern continuous tone images.
So without further ado, here is the quick-start.
Example Conversion Batch
The following comes with the latest A2B distribution. A2B is bundled with Bmp2DHR and so does M2S.
@echo off
REM By the time I was done
REM I had pretty much abandoned The GIMP for ImageMagick
REM For production development of an interface
version
REM I would likely use the ImageMagick
API to save some time
if not
exist SHRTONE\*.* mkdir SHRTONE >NUL
if not
exist SH33TONE\*.* mkdir SH33TONE >NUL
if not
exist SH32TONE\*.* mkdir SH32TONE >NUL
if not
exist SHRPCX\*.* mkdir SHRPCX >NUL
if not
exist SH32PCX\*.* mkdir SH32PCX >NUL
if not
exist SH33PCX\*.* mkdir SH33PCX >NUL
if not
exist SHRGREY*.* mkdir SHRGREY >NUL
if not
exist PCX\*.* mkdir PCX >NUL
if not
exist BMP320\*.* mkdir BMP320 >NUL
if not
exist todo\*.* mkdir todo >NUL
if not
exist done\*.* mkdir done >NUL
if not
exist gif\*.* mkdir gif >NUL
REM call ImageMagick to
make a 16 color error-diffusion dithered version
REM use as an external palette for conventional
color space toning
REM in windows use pcx
format for imagemagick's indexed output (for
compatibility)
for %%f
in (*.bmp) do call C:\IM\convert %%f -dither FloydSteinberg
-colors 16 -define format:PCX PCX\%%~nf.pcx
REM Make 7 variations to choose from
REM the first will usually be the worst and
unusable
for %%f
in (*.bmp) do call ..\a2b %%f SHRTONE\%%f shr2 d v t i
> NUL
for %%f
in (*.bmp) do call ..\a2b %%f SH32TONE\%%f dic3 d v t i
> NUL
REM The TONE variations are always
more heavily contrasted
for %%f
in (*.bmp) do call ..\a2b %%f SH33TONE\%%f drooks3 d v t i
> NUL
for %%f
in (*.bmp) do call ..\a2b %%f SHRPCX\%%f shr2 d v t i
pPCX\%%f > NUL
for %%f
in (*.bmp) do call ..\a2b %%f SH32PCX\%%f dic3 d v t i
pPCX\%%f > NUL
for %%f
in (*.bmp) do call ..\a2b %%f SH33PCX\%%f drooks3 d v t i
pPCX\%%f > NUL
for %%f
in (*.bmp) do call ..\a2b %%f SHRGREY\%%f shrgrey d v
t i> NUL
Explanation of Example Batch and Equivalent Manual Command Entry
Enter Options in Order, Filename(s) First
The input filename is always first, followed by the other options. To specify a different output path, follow the input file name with the pathname of the output file name. Pathnames can contain directory names, relative or otherwise.
Follow Input (and Output) File Names with Output Type
The type of output that you are specifying should follow file names.
In the batch file shown above, the shr2 option tells A2B to make a 1-palette file (this file still has 16 palettes but only the first palette is active and the other 15 are blank). The dic3 option tells A2B to make a 16-palette file and the drooks3 command option tells A2B to make a 200-palette output file. The shrgrey command option tells A2B to make a greyscale output file using the default method of de-saturation (like in most modern programs).
Follow Output Type with Rendering and Other Options
The “d v t i” option string represents 4 separate options and must be separated by spaces.
- Option d tells A2B to provide dithered output using the Buckels error-diffusion dither.
- Option v tells A2B to provide Preview output in the form of a BMP file. A2B offers support for processing edited preview files and then reprocessing these through the use of the M2S (Magick to SHR) utility now included in the same distribution as A2B. To specify M2S compatible output substitute option v with option m2s.
- Option t tells A2B to append CiderPress File Attribute Preservation Tags to Apple IIgs Output for easy placement on a 2mg disk image or CF card using CiderPress. Or you can just place these yourself the hard way by omitting the tags option t and trying to remember what these are when you place them by hand.
- Option i tells A2B to use image tone to define color space rather than using the color space of the DHGR colors in the default palette.
The final option on the command line for those conversions that use an external palette is option p, the palette option, followed by the full filename of the palette (including path if desired).
The A2B Demo Disks Revisited
The A2B Demo Disks come in a variety but one thing that they all have in common is the fact that the Apple II output files have never been edited; these are straight conversions and simply depend on input file quality and suitability of input file for continuous tone conversion. They are the lowest common denominator. So what is the lowest common denominator?
Generally the first thing is that a GIF file is not a continuous tone image. To A2B this is damaged goods. Likewise are images that have been tweaked in a cheap photo editor to print “better” or be “white-balanced”. Tweaks that muck with tone destroy color information. A single high quality toolset or editor should always be used for scaling and editing. Since I wrote a tested this converter extensively I know what works and what doesn’t. Anything less than the Lanczos in The GIMP or the default scaling in ImageMagick is not good quality scaling, despite what some articles by the so-called experts may tell you. That is generally speaking.
Sometimes you can’t avoid damaging an input file. A case in point is when you use a free paint program like Windows Paint and resave the input file as a BMP again after editing. Therefore if you want to preserve the original and avoid changing anything your best bet is to use your toolset and save the GIF to a 24-bit BMP or some other non-lossy format before your edits and edit the raw copy wherever you want and keep it raw and uncompressed. Use your toolset religiously to convert back again to jpg. Or png.
ImageMagick Automatic Conversion to Useful Formats
The following batch file is pretty fancy but does some basic stuff that you may want to do. The idea here is to convert large numbers of files and single files alike.
@echo off
if not
exist SHRTONE\*.* mkdir SHRTONE >NUL
if not
exist SH33TONE\*.* mkdir SH33TONE >NUL
if not
exist SH32TONE\*.* mkdir SH32TONE >NUL
if not
exist SHRPCX\*.* mkdir SHRPCX >NUL
if not
exist SH32PCX\*.* mkdir SH32PCX >NUL
if not
exist SH33PCX\*.* mkdir SH33PCX >NUL
if not
exist SHRGREY*.* mkdir SHRGREY >NUL
if not
exist PCX\*.* mkdir PCX >NUL
if not
exist BMP320\*.* mkdir BMP320 >NUL
if not
exist todo\*.* mkdir todo >NUL
if not
exist done\*.* mkdir done >NUL
if not
exist gif\*.* mkdir gif >NUL
if
"%1" == "" goto BEGIN
if
"%1" == "box" goto BOX
if
"%1" == "BOX" goto BOX
if
"%1" == "BMP" goto BMP
if
"%1" == "bmp" goto BMP
goto
RESIZE
REM Notes from the ImageMagick
Forums about using convert (in Windows?)
convert image -resize "275x275^" -gravity center -crop 275x275+0+0
+repage resultimage
see http://www.imagemagick.org/script/comma ... p#geometry
regarding ^ and other character options.
This resizes according to the smaller of your
input image dimensions keeping aspect ratio. Thus the smaller dimension will
end
up as 275, but the larger dimension will be larger. Thus the crop following the resize.
On Windows you may have to escape the ^ with ^ so
that it is ^^ (if the quotes don't help). See
http://www.imagemagick.org/Usage/windows/
Alternately, you can resize to the larger
dimension and then pad the image
convert image -resize "275x275" -gravity center -background
white -extent 275x275 resultimage
Alternately, you can resize and lose aspect ratio
( and accept some distortion)
convert image -resize "275x275!" resultimage
examples are at http://www.imagemagick.org/Usage/resize/#fill
I have had some trouble with BMP conversions too.
I have typically specified BMP3:outfile.bmp and I normally get 24 bit BMP
files. sometimes I get an 8 bit BMP when
converting JPEG files. I just tried the -type truecolor
(having seen it here) and now
it looks like I get a 24 bit BMP in the cases where I used to get
only 8 bits.
I also use these switches:
-units PixelsPerInch -density 72 -compress None -depth 24
the -depth 24 should do a 24 bit BMP (the depth -8 in your case may
also be causing a problem) but as I said I sometimes get 8
bits even with the 24 specified.
the -units and -density cases corrected a problem where sometimes I
would get a 0 for the biXPelsPerMeter and biYPelsPerMeter
fields in the BMP header (it did not seem to cause a problem though). by the way I have not found a good explanation of these 2
fields.
the -compress None was required because sometimes a conversion
generated a compressed BMP - no logical reason for doing that was
found.
REM End of Notes
:RESIZE
C:\IM\convert %1 -resize "320x200!" -type truecolor -units PixelsPerInch
-density 72 -compress None -depth 24 -define format:BMP3
Resized_%1
goto ENDER
:BMP
for %%f
in (*.bmp) do call C:\IM\convert %%f -resize "320x200!" -type truecolor -units PixelsPerInch
-density 72 -compress None -depth 24 -define format:BMP3
BMP320\%%~nf.bmp
goto ENDER
:BOX
REM for %%f in (*.gif) do call C:\IM\convert %%f -resize
"320x320" -gravity center -background black -extent 320x320 -crop
320x200+0+0 +repage -define format:BMP
%%~nf.bmp
REM for %%f in (*.png) do call
C:\IM\convert %%f -resize "320x320" -gravity center -background black
-extent 320x320 -crop 320x200+0+0 +repage -define format:BMP %%~nf.bmp
for %%f in (*.jpg) do call C:\IM\convert %%f -resize
"320x320" -gravity center -background black -extent 320x320 -crop
320x200+0+0 +repage -define format:BMP
%%~nf.bmp
goto ENDER
:BEGIN
REM this next one is mostly for double dithering
for %%f
in (*.pcx) do call C:\IM\convert %%f -resize
"320x200!" -type truecolor -units PixelsPerInch -density 72 -compress None -depth 24 -define
format:BMP3 %%~nf.bmp
for %%f
in (*.gif) do call C:\IM\convert %%f -resize "320x200!" -type truecolor -units PixelsPerInch
-density 72 -compress None -depth 24 -define format:BMP3
%%~nf.bmp
for %%f
in (*.png) do call C:\IM\convert %%f -resize
"320x200!" -type truecolor -units PixelsPerInch -density 72 -compress None -depth 24 -define
format:BMP3 %%~nf.bmp
for %%f
in (*.jpg) do call C:\IM\convert %%f -resize "320x200!" -define format:BMP %%~nf.bmp
:ENDER
REM this is the end
There, that is pretty
straight-forward. For an ImageMagick user that is. I
should note that The GIMP also supports a script mode but to my way of thinking
it is more targeted at the Linux user than at a Windows User. I am not sure if
The Mac has some other similar utilities. My own gut feeling is that a Mac
power user would probably use ImageMagick with A2B.
Closing Remarks
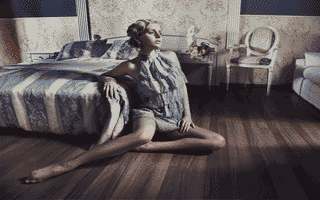
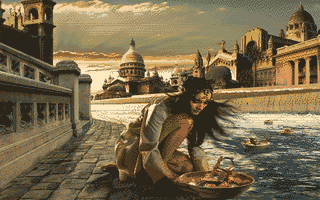
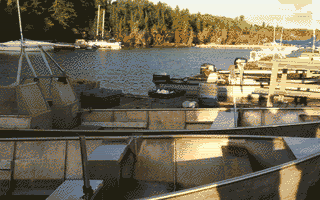
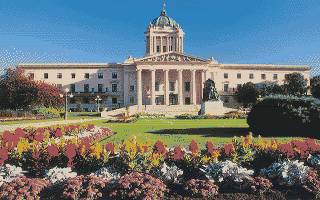
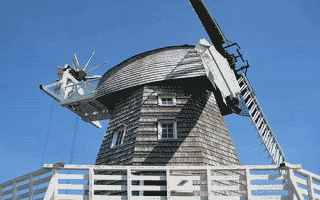
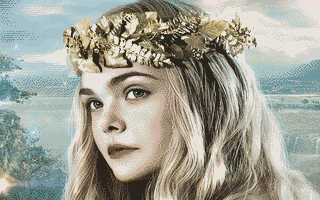
The previews of A2B output of 16-pallete Apple IIgs SHR
files shown below include some pictures from where I live in
I get caught-up on my writing when I take a break from maintaining my equipment and other work-related activities, but we even fish in the winter, with nets under the ice, so it seems that there is little time to document programs like A2B. Programming these types of programs seems to be the easy part; sharing them seems impossible without at least some documentation.
|
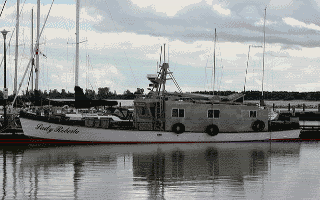
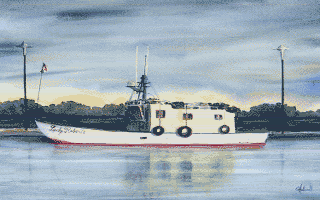
Lady Roberta in
|
|
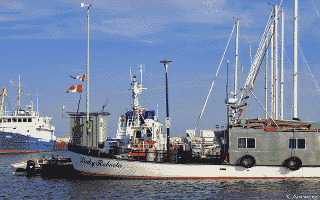
Lady Roberta on
|
|
|
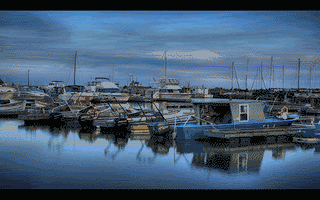
Skiffs at
|
|
Museum at
|
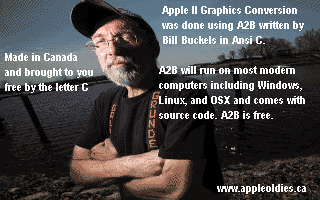
Me
|
|
|
|
|
|
|
|
|
|
|

Much more can be said about using A2B to convert SHR files. I have barely scratched the surface in this quickstart article, but I have gone on long enough. You have enough information to get started. Not only does A2B have more SHR options than what I have discussed here, A2B also converts to all the other Apple II graphics modes (with the exception of HGR which is handled in Bmp2DHR) and more. Since A2B comes with Bmp2DHR you will have a relatively complete Apple II graphics conversion toolset if you download this.
Since all of this comes with commented source code that is relatively if not complexly unrestricted and free, you can read further in the source code, use the converters and make your own improved version if you wish. I am not sure when I will be finished writing the documentation if ever, since my focus is on moving all of this forward, and developing all of this further.
I wrote the A2B converter primarily for myself, and just for fun, and because I could. During this development, I could have expanded this a great deal and probably spent the rest of my days on the planet fine-tuning. I may do that, but in the meantime what you have here seems to work pretty well for what it does. I hope you enjoy it as much as I enjoyed writing it. The other fun thing is that graphics programs are fun to test providing one knows what they are doing and does something significant enough to warrant testing. I would submit to you that because the Apple II graphics modes are not really programmer-friendly they present an intellectual challenge that the average solitary programmer like me will not find in today’s world, for those who enjoy that sort of thing,
All the Best,
Bill Buckels
May 1, 2015